 |
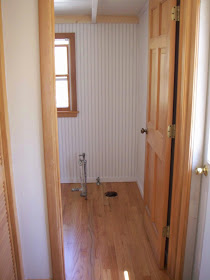
| Bathroom with bead board and hardwood floors installed |
If you've never bought a house that needed every room painting, you can't imagine how daunting it can be. While we were ecstatic to see the mauve tiles gone and the bead board up, it meant we had a lot of work ahead of us.
 |
| After |
We'd never painted bead board before so we asked our friend Scott, paint guru, for advice.
Here's what he had to say:
Invest in a couple of good quality Purdy brushes. Don't use a roller. A roller is only for painting the sheetrock walls of a suburban ranch house. It leaves a "stippled" texture on the paint and its sole purpose is to hide the shoddy workmanship of your average stoned sheetrock installer. :-)
Any wooden surface has to have its paint brushed on. The brushed on paint on a wooden surface will leave a glossy, almost textureless surface if applied right. Seeing the brush stroke, running with the length of the grooves in the wainscot, is perfectly OK but if you use the right amount of paint on the brush the paint will level itself out and the brush marks will flow out leaving a finish that looks almost sprayed on.
You can cheat a little and use a roller to get the paint on the wood surface, but do only, say, 12" wide at a time and follow immediately behind with a brush to knock down the stippled texture left by the roller. This will leave behind a lovely brush stroke that, with luck, you will learn to make flow out and disappear completely.
...On second thought, just hire someone to paint the place. Hah, Hah!
Scott
Well, hiring this job out was something we could not do. It wasn't in the budget for one thing. And we do try to do all that we are able to do ourselves on our projects, leaving the specialty work up to the pros. Not that painting is not a specialty task. But it's one for which I have a certain affinity. Patience and practice appear to be the keys.
And we certainly got a lot of practice while remodeling this cottage!
If you are about to embark on a painting project, be sure and check out our #1 Paint Tip. It's a real time-saver!
If you are about to embark on a painting project, be sure and check out our #1 Paint Tip. It's a real time-saver!


No comments:
Post a Comment