
You know how some people have good parking karma — a spot always opens up for them just when they need it. Well, I have good artwork karma. I've been collecting art for most of my life and have had some unbelievably good large-scale canvases fall into my lap. Though I've acquired many large canvases for free, framing them can be costly, so I'm excited to share with you this easy DIY hack to create a simple float mount frame.

This giant canvas is called "Birds in the Garden". I love the colors and motion.

This ominous red work is called "The Bad Dog" — after an incident my friend had while walking her (good) dog in the park and having an altercation with a bully dog.

This one is a painting of a waterfall in sunlight. It's actually oriented on it's side here to fit the space so you can't really get the full effect.

The large canvas that hangs in our bedroom I literally stumbled upon while rollerblading in SoHo. It's called "Ham and Gravy".

In the 80s SoHo was a mecca for artists who lived and worked in the giant warehouses south of Houston Street. Today those lofts are multi-million dollar condos. So when I saw this laying out near the trash in front of a big loft building, my first thought was maybe there are still starving artists in SoHo and one of them is for some reason throwing this lovely painting away. On second thought it occurred to me that someone may simply be moving and just set it there momentarily. I conferred with the art gods and decided that if it was still there when I got back, it was mine. You should have seen me zipping across the Brooklyn Bridge with this giant painting hanging out my Mini Cooper convertible.

This one I purchased on Krrb for about $400. It doesn't have a name anywhere on it.

I call it the "Fake Pollock" and I'm pretty sure it was painted for a theatre production. There were some other set designs and furnishings in the same lot.

This one I found at a thrift store in Queens for under $100. I removed it from it's hideous ornate frame and just hang the canvas in our bedroom over the bureaus. The composition is a small town in the late 19th century, a village street in what looks like France. It's full of lush sky in lovely teals, taupes and greens and it looks great hanging against the backdrop of our wall paint, which is Farrow & Ball "Blackened," a silver-gray.
So, I've been wanting to frame these and a few others for years. Some time ago I'd bought a good miter saw on sale and I started to prep by reading up on the various types of frames for canvas paintings, saving the best tutorials to get the effect I want. Mandi at A Beautiful Mess has a thorough roundup of three different types of DIY frames for canvas artwork.
 |
| via A Beautiful Mess |
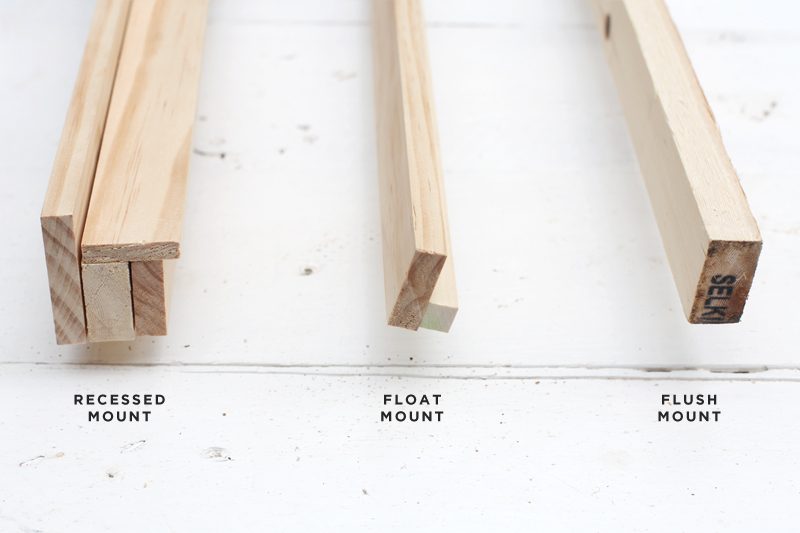
I like the esthetics of the float mount frame — the way the art is set forward inside an unobtrusive box allows it to be the rightful star of the show.
 |
Remodelaholic has what looks to be the easiest shortcuts to a float mount frame...
 |
... That is, until Dad got ahold of the idea and ran with it, taking "hack" to a whole new level.
What I'm about to show you may just be the easiest float mount frame hack ever invented, and I'm going to break it right down for you.

As Dad was in town and he's always game for a project, I broke out my new saw and asked for a tutorial on making angled cuts.
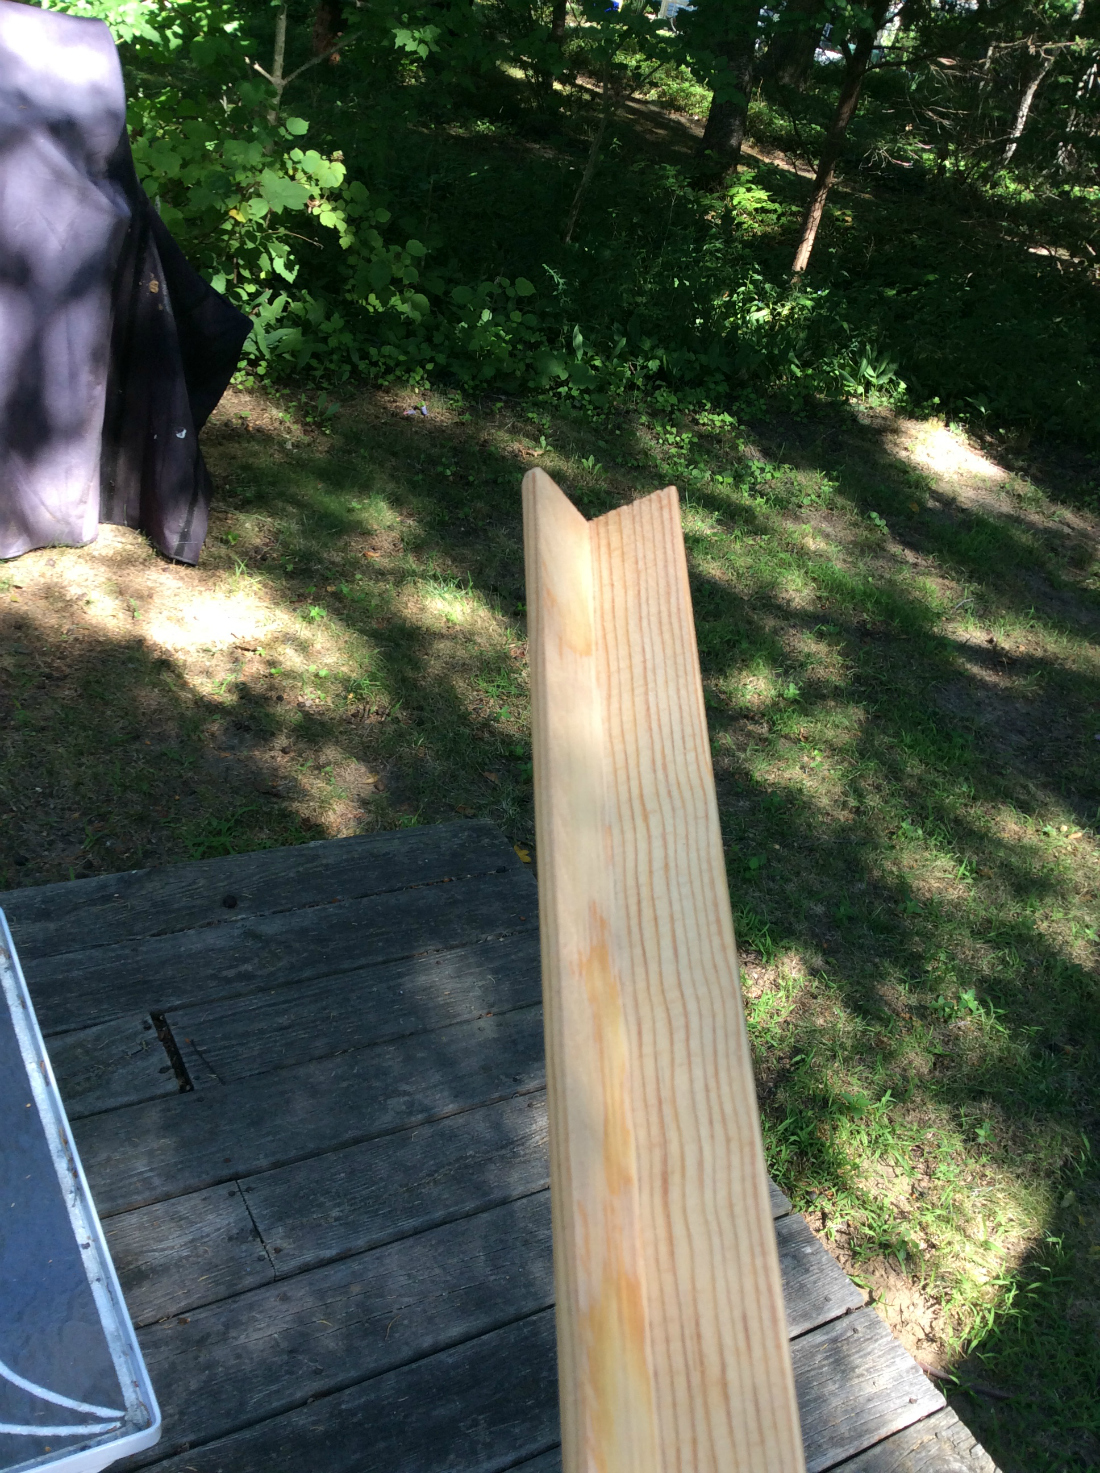
Good thing I thought to ask him, because even as I was showing the various float mount frame tutorials, he was already engineering a way to make it even easier, by jump-starting the project using wood corner molding, which is already L-shaped.
Off we headed to Riverhead Building Supply to load up the mini-cooper with some 10-foot lengths of trim and the rest of the tools and materials we'd need.
Tools & Materials
- Miter saw or miter box and hacksaw
- Sanding block
- Paint brushes
- Flat black paint
- Varnish
- Poly or wax finish (optional)
- Wood glue
- Clamps
- Measuring tape
- Marker
- Lengths of wood — 1-5/16" outside corner moulding
Step 1: Measure your canvas(es). Take special note of the depth of each canvas. This hack works for canvases that are 1" deep or less. You may think at first glance that you have another 5/16" to play with — I know I did — but wood moulding it turns out is measured on the outside, not the inside of the moulding.

Step 2: Give the rough wood a good scuff with a sanding bar, then wipe away all the dust using tack cloth.

Step 3: Paint the interior of your "frames" with black chalkboard paint. This will help give the illusion that the canvas is floating in a box.

Step 4: When the inside corners have dried, varnish the outside and front, which are going to be the visible parts of the finished frame, in your choice of stain.

Step 5: After that dries give it a second coat if needed. I first used a red wood color, but it was a bit too red so I gave it all a second coat of walnut and arrived at what I think is a pretty perfect mid-century wood tone.

Step 6: Make your cuts.

Step 7: Glue the corner angles and clamp them and wait for them to dry. We used these handy angled clamps and glued and fitted them with the canvas right inside. This made the fit so tight that we didn't need to nail the frame into the canvas stretcher, the way many methods do.

Step 8: Step back and admire your handy work. You've just created a custom frame for your artwork at the cost of materials and it looks like a million bucks.


No comments:
Post a Comment