Our pedestal table has survived three moves and two renovations—and in the process experienced some hard knocks. It wasn't in perfect condition when I found it on Craigslist. I paid $175, if memory serves, and there were dings and scratches on the pedestal base, which I sanded and painted. In the last move, though, the laminate top was gouged in a very prominent spot. Strategically placed candles got me through. (I do love these colorful candles that I found at Designer's Guild in Chicago!) But was there a permanent fix for this chipped laminate? I did some research on how to repair laminate and found a product contractors use to fill seams on laminate countertops, called, fittingly, SeamFil. Here's how it works.
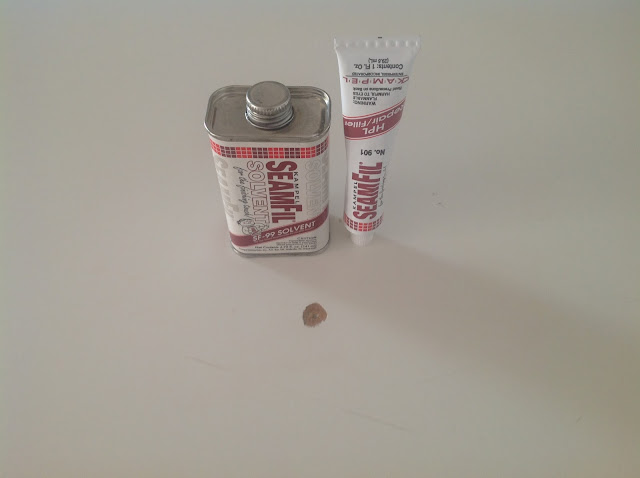
If you're repairing a laminate countertop (or as in my case, a table top), you'll need the following materials this project:
- Tube of SeamFil, color-matched to your counter top
- SF-99 Solvent
- Putty knife
- Pliers and Screw driver to open solvent lid
- Scrap piece of cardboard to mix the SeamFil on
- Paper towels
- Protective gloves
SeamFil and the SF-99 Solvent are manufactured by Kampel and both can be purchased online at Amazon or direct from the American Technology Inc. website, where you'll also see this helpful how-to video.
So, ready to repair some laminate?
Step 1: Open the can of solvent.
The lid is very tight. I had to use a pliers to budge it. Once you get the cap off, use a screwdriver to break the metal seal.


Step 2: Apply solvent to a clean paper towel.
Thoroughly wipe the chipped area that you will be working on. Allow the solvent to dry.


Step 3: Remove the cap from the tube of SeamFil.
Turn the cap around and use the convex tip to puncture the tube. Squeeze a dab of SeamFil out onto a clean piece of cardboard.


Step 4: Using your putty knife, smooth the filler back and forth until it thickens.

Step 5: Fill the gouge in your laminate with SeamFil, then scrape off the excess.
Allow the filler to cure about 5 minutes.


Above is the repair after one round of filler. My table gouge is particularly large and deep—much bigger than the example shown in the video. So I decided to add another round of filler.
I waited five minutes, then repeated steps 4-6. Here is how it looked after two layers of filler.

Not perfect by any means. You can still see an indentation. It's like a little white crater now.
Here's a close up—before and after two coats.

Step 6: Apply a small amount of solvent to a clean paper towel and wipe it across your repair.

Above is the repair after one round of filler. My table gouge is particularly large and deep—much bigger than the example shown in the video. So I decided to add another round of filler.
I waited five minutes, then repeated steps 4-6. Here is how it looked after two layers of filler.

Here's a close up—before and after two coats.
The next day, I added a third coat. This time I worked the filler longer, until it started to mold and I put a dollop into the crater. I then took a piece of very thin and stiff postcard stock paper and scraped it across the mound of filler to flatten it. That filled the crater nicely.
From a distance, you can't see that there was ever a gouge.
I haven't given up my favorite candles, but I don't have to worry whether they're concealing a ding.
From a distance, you can't see that there was ever a gouge.
I haven't given up my favorite candles, but I don't have to worry whether they're concealing a ding.


Thanks for this! Can you provide details on how your previous sanding/painting of the base? What grit paper did you use? Any particular paint to use? High gloss finish I assume? Thanks so much for any details. I'm contemplating buying a fixer-upper.
ReplyDeleteI used a 120 grit sanding block I happen to keep around. Then I wiped it down with tack cloth. Then I sprayed it with Rust-Oleum 12oz Universal Spray Paint in Matte White (with Primer) not glossy.
Delete