I'm approaching the finish line on our
cottage kitchen refresh. The
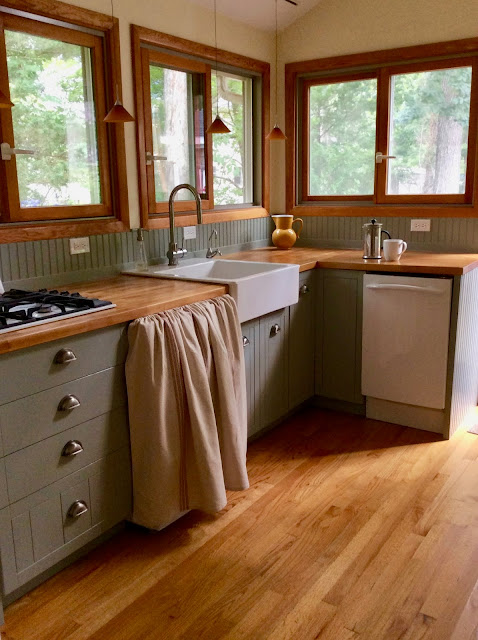
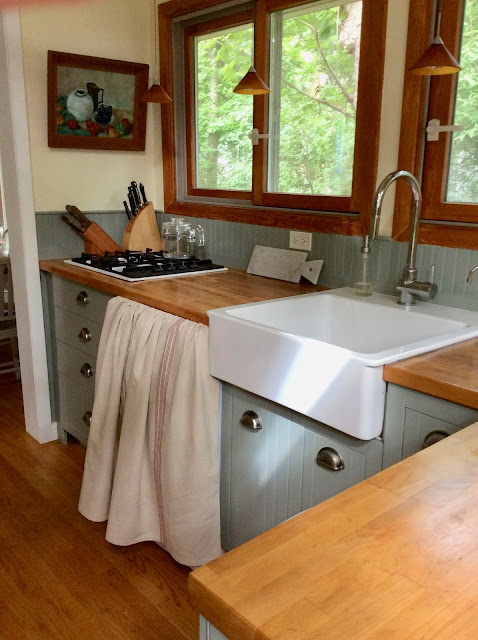
new paint color—"craftsman" gray, as one of you so aptly described it—has added a warmth and dimension to this modest kitchen. Now that the cabinets and trim are all one color, from toe kick to backsplash, it feels more built-in and solid and so cottage-y good. How would it look if I went full "cottage core" and added a sink skirt to cover the washer dryer? I don't have my sewing machine with me at the cottage, but I do have some iron-on
hem tape from some long-forgotten curtain project. So, I decided to give no-sew a try.

You may be wondering: Why install a washer/dryer in your kitchen to begin with? There just isn't another place for it in this small cottage. The fridge on the right is recessed into the only available wall space, which backs a storage closet/pantry we can't live without. The wall behind the sideboard backs a bathroom, dominated by a claw-foot tub I adore, so there's no extra room in there. The rest of the cottage consists of four tiny bedrooms without closets and a front porch that has windows on all sides. And, no, not having a washer/dryer is not an option. Given all the damp towels and bedding this beach cottage sees, it's a must-have. So when I designed the kitchen, I turned to this under-the-counter LG model that I had once sourced for my Brooklyn apartment renovation. But though it is compact, it's not integrated and stands "proud" of the cabinets. Would a sink skirt help? Or would a sink skirt make it stand out even more? Some of you are not fans of the skirt. So, let's try it and see.

Part I of the Project: Installing the Curtain Wire
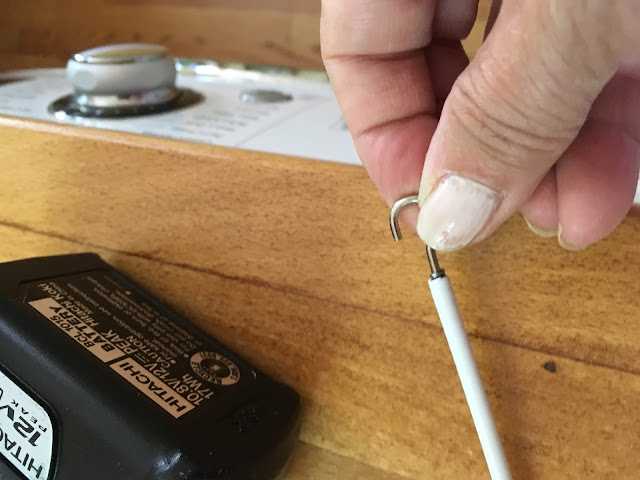
The space above the washer is about an inch, so a tension curtain rod is out, as the diameter of the rubber caps on each end exceed the allotted space on even the smallest available. So, I'm employing an old-school solution—coated wire with hook-and-eye hardware—to hang the curtain. The cord is slightly stretchy and can be cut to measure, and the hooks screw right into the ends of it. I found this kit with everything I needed on
Amazon for $6. It's very easy to install; let's take a look.
Step 1: Assemble your tools. To install the curtain wire, you'll need a measuring tape, marker, drill and smallest drill bit, and a wire cutter.
Step 2: Drill pilot holes into the underside of the counter.

Step 3: Screw in the "eyes."
Step 4: Measure and mark the placement of the curtain wire and using the wire cutter, cut to fit.
Step 5: Screw in the hooks on either end.
Part I is complete. With the curtain wire at the ready, it's time to make the curtain.
Part 2 of the Project: Making a No-Sew Hemp Skirt
Step 1: Choose your fabric. I looked for grain sacks, however, the width was too small and without my sewing machine, I want to keep this project simple. The conventional wisdom for a curtain is the width of the fabric should be twice the width of the space you'll be covering if you want generous pleats. That's 48" to cover this space. I settled on a length of
rough linen with a red stripe that came 54" wide.
Step 2: Assemble your tools—in this case just iron-on hem tape, scissors, and iron.
Step 3: Roll over the rough edge of the fabric and press it.
Step 4: Place the iron-on hem tape inside the fold and roll it over again, and press it. Do this on all four sides of the fabric, so that every rough edge is hemmed.
Step 5: Finally, at the top of your curtain, create another fold, slip the iron-on hem tape under it, and press it. This creates the top loop for hanging the curtain.
Step 6: Run the curtain wire through the top loop to hang it. Attach the hooks into the eyes.
Your "sink skirt" is complete.
I'm approaching the finish line on our
cottage kitchen refresh. The
new paint color—"craftsman" gray, as one of you so aptly described it—has added a warmth and dimension to this modest kitchen. Now that the cabinets and trim are all one color, from toe kick to backsplash, it feels more built-in and solid and so cottage-y good. How would it look if I went full "cottage core" and added a sink skirt to cover the washer dryer? I don't have my sewing machine with me at the cottage, but I do have some iron-on
hem tape from some long-forgotten curtain project. So, I decided to give no-sew a try.

You may be wondering: Why install a washer/dryer in your kitchen to begin with? There just isn't another place for it in this small cottage. The fridge on the right is recessed into the only available wall space, which backs a storage closet/pantry we can't live without. The wall behind the sideboard backs a bathroom, dominated by a claw-foot tub I adore, so there's no extra room in there. The rest of the cottage consists of four tiny bedrooms without closets and a front porch that has windows on all sides. And, no, not having a washer/dryer is not an option. Given all the damp towels and bedding this beach cottage sees, it's a must-have. So when I designed the kitchen, I turned to this under-the-counter LG model that I had once sourced for my Brooklyn apartment renovation. But though it is compact, it's not integrated and stands "proud" of the cabinets. Would a sink skirt help? Or would a sink skirt make it stand out even more? Some of you are not fans of the skirt. So, let's try it and see.

Part I of the Project: Installing the Curtain Wire
The space above the washer is about an inch, so a tension curtain rod is out, as the diameter of the rubber caps on each end exceed the allotted space on even the smallest available. So, I'm employing an old-school solution—coated wire with hook-and-eye hardware—to hang the curtain. The cord is slightly stretchy and can be cut to measure, and the hooks screw right into the ends of it. I found this kit with everything I needed on
Amazon for $6. It's very easy to install; let's take a look.
Step 1: Assemble your tools. To install the curtain wire, you'll need a measuring tape, marker, drill and smallest drill bit, and a wire cutter.
Step 2: Drill pilot holes into the underside of the counter.

Step 3: Screw in the "eyes."
Step 4: Measure and mark the placement of the curtain wire and using the wire cutter, cut to fit.
Step 5: Screw in the hooks on either end.
Part I is complete. With the curtain wire at the ready, it's time to make the curtain.
Part 2 of the Project: Making a No-Sew Hemp Skirt
Step 1: Choose your fabric. I looked for grain sacks, however, the width was too small and without my sewing machine, I want to keep this project simple. The conventional wisdom for a curtain is the width of the fabric should be twice the width of the space you'll be covering if you want generous pleats. That's 48" to cover this space. I settled on a length of
rough linen with a red stripe that came 54" wide.
Step 2: Assemble your tools—in this case just iron-on hem tape, scissors, and iron.
Step 3: Roll over the rough edge of the fabric and press it.
Step 4: Place the iron-on hem tape inside the fold and roll it over again, and press it. Do this on all four sides of the fabric, so that every rough edge is hemmed.
Step 5: Finally, at the top of your curtain, create another fold, slip the iron-on hem tape under it, and press it. This creates the top loop for hanging the curtain.
Step 6: Run the curtain wire through the top loop to hang it. Attach the hooks into the eyes.
Your "sink skirt" is complete.


No comments:
Post a Comment