 |
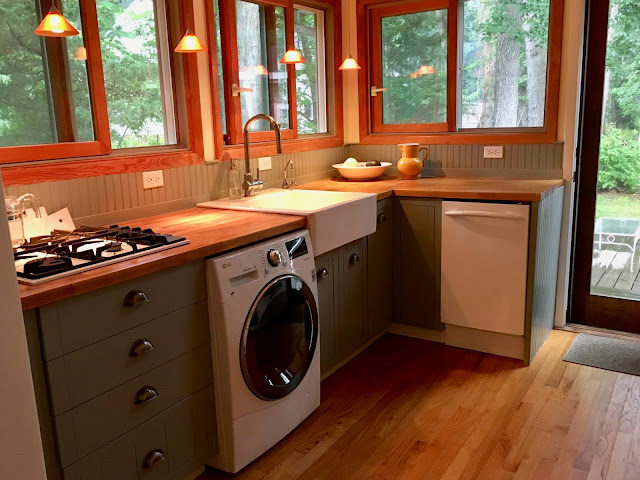
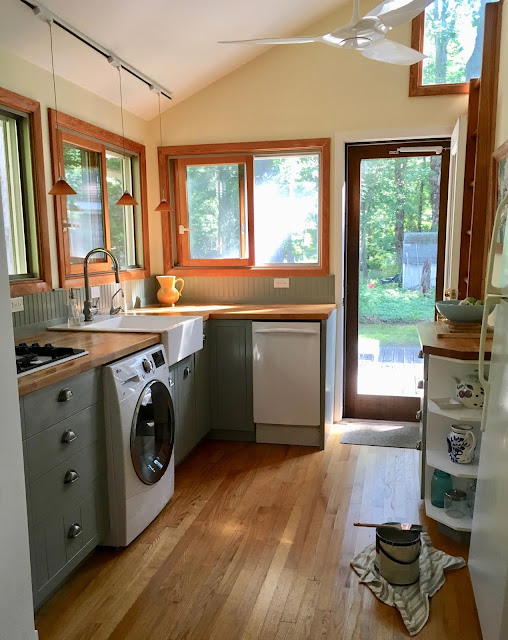
You've heard of "pandemic baking"? Welcome to my version: pandemic painting. Rather than dwell on the sad prospect of a summer with no guests, I'm seizing this opportunity to spruce the place up. Most of the walls haven't seen a lick of paint since we bought the place and painted it top to bottom in 2007. The kitchen was in slightly better shape; we'd renovated 11 years ago using plain IKEA pine cabinets (no longer available), painted a nondescript off-white. I've been itching for a cabinet-color refresh for years, and now—with no guests underfoot—is the time.
I've been casually shopping paint colors for years and settled on Farrow and Ball "Pigeon"—a gray that tends to read greenish. It complements the cool yellow walls (Benjamin Moore "Man on the Moon") and the red oak window trim and butcher block countertops.
I actually love to paint and find it very relaxing. I've developed a pretty steady hand over the years, and have learned how to "cut in" with my brush, so I no longer bother with paint tape or drop cloths. A Purdy 2" brush is my best friend and I make sure not to overload it with paint. I clean it immediately after I finish for the day. The key for me is to take my time. Gone are the days when I'd race to finish a room in a single weekend. I tackled this project in stages. The first weekend I painted the ceiling. The following weekend I painted the walls. Next, I filled holes in trim and sanded. Painting the cabinets and trim actually took several weeks to complete.
In no hurry at all, I painted the cabinets a bit at a time over a period of several weeks. I started with the backsplash.
With full overlay doors, you don't have to paint interiors or facings, so I didn't even need to remove the contents of the cabinets. Easy peasy. Well, except for that one hinge inside the sink cabinet that had rusted. After wrestling it out, I dropped the hardware in a jar of vinegar and let natural acid take its course. After a week in vinegar, the rust was easily brushed away and it screwed right back in without a hitch—which was a good thing, as our nearest hardware store is still closed due to COVID-19 and I didn't have extra flat-head screws the right size.
Next up, going deep cottage core, I'll be making a feed-sack skirt to cover the washer dryer.


I really like this!The darker cupboards look SO much better! What is a feed-sack skirt for the washer dryer??
ReplyDeletehttps://anvilstrawbale.com/
Hi Gabbi, a feed sack, sometimes called a grain sack, is rough burlap material that's been upcycled from vintage sacks that grain used to be packaged in. I see them all the time in vintage and antique stores. The only problem for me is they come in usually narrow widths of 17"-22". So for this project I located some rough linen from an online fabric store that had a similar look and feel, with the traditional red lines that the grain sacks of yesteryear had. I could have stitched two grain sacks together if I'd had my sewing machine with me. But in the end, the linen worked out just fine.
Delete