I finally completed a project that I'd been wanting to tackle for some time—giving the hall bathroom in my parent's home a glow up. It meant removing wallpaper, which is no one's favorite task. We kind of suspected it wouldn't be easy, and it wasn't, but we rolled with it, and the transformation is gratifying.
Mom has never been a fan of wallpaper in bathrooms. But this bathroom already had wallpaper when my parents purchased the home more than a decade ago. They'd been putting off replacing the paper, because—been there, done that—they knew that if the walls had not been prepared properly before papering, they'd be dealing with a mess. And they were right.
Read on to learn what happened as the project got underway and how I worked through the various problems that arose.

Why Does Wallpaper Removal Tear Drywall Face Paper?
In most cases, removing wallpaper does not bring the drywall face paper with it. This only happens when the original wall was not "sized" prior to papering.
Sizing is an old-school term for preparing the walls. Years ago professional paper hangers would apply diluted wallpaper paste and let it dry before hanging new wallpaper. The adhesive soaked into the fresh plaster and this acted as a sealant.
Today we have primers that work much better. But newbie DIYers faced with fresh drywall often don't know they need to take this extra step and prime the walls before hanging wallpaper.
When you purchase a home that already has wallpaper, you have no way of knowing if the person who installed it did the job properly. But you'll soon find out, because there's no way to remove wallpaper from poorly prepared walls without tearing the wallboard. You just have to remove it as best you can, then deal with the damage afterwards.

Fixing Torn and Gouged Drywall
In our project, large swathes of wallboard lost their face paper. No problem. The gouges can be repaired in three steps:
1. Primer the brown areas. (I use Zinzer Bin primer.)
2. Let it dry, according to the instructions on the primer, then mud and tape the areas.
3. Sand the walls, vacuum all dust particles and wipe down with tack cloth, then primer the entire wall, end to end. Now your walls are ready for paint or new paper.

Hiding Imperfections in Textured Walls
To make our paint project just that much more challenging, we were dealing with walls that were not all the same texture in this room. The walls in the shower area were deeply stippled—a kind of effect you get by using a deep nap roller that leaves a popcorn-like pattern in the paint.
The walls over the sink and toilet had a different texture, smaller and more like orange peel.
While the walls near the door were new wall board—these were the areas where there were tears.
Given three different textures, I was challenged to figure out how to make it all work cohesively. I decided to purchase a coarse sand-additive to mix into the paint—but to use it only on the walls outside the shower area. This way we could build those up to match the stippled areas.
Applying the first coat of paint to all the walls in the room, I used no sand additive at all. Then I gave just the stippled shower area a second coat. At that point I poured the sand mixture into the remaining paint and painted the orange-peel textured walls. Finally, I added even more sand to the paint, and I painted the repaired wallboard walls.
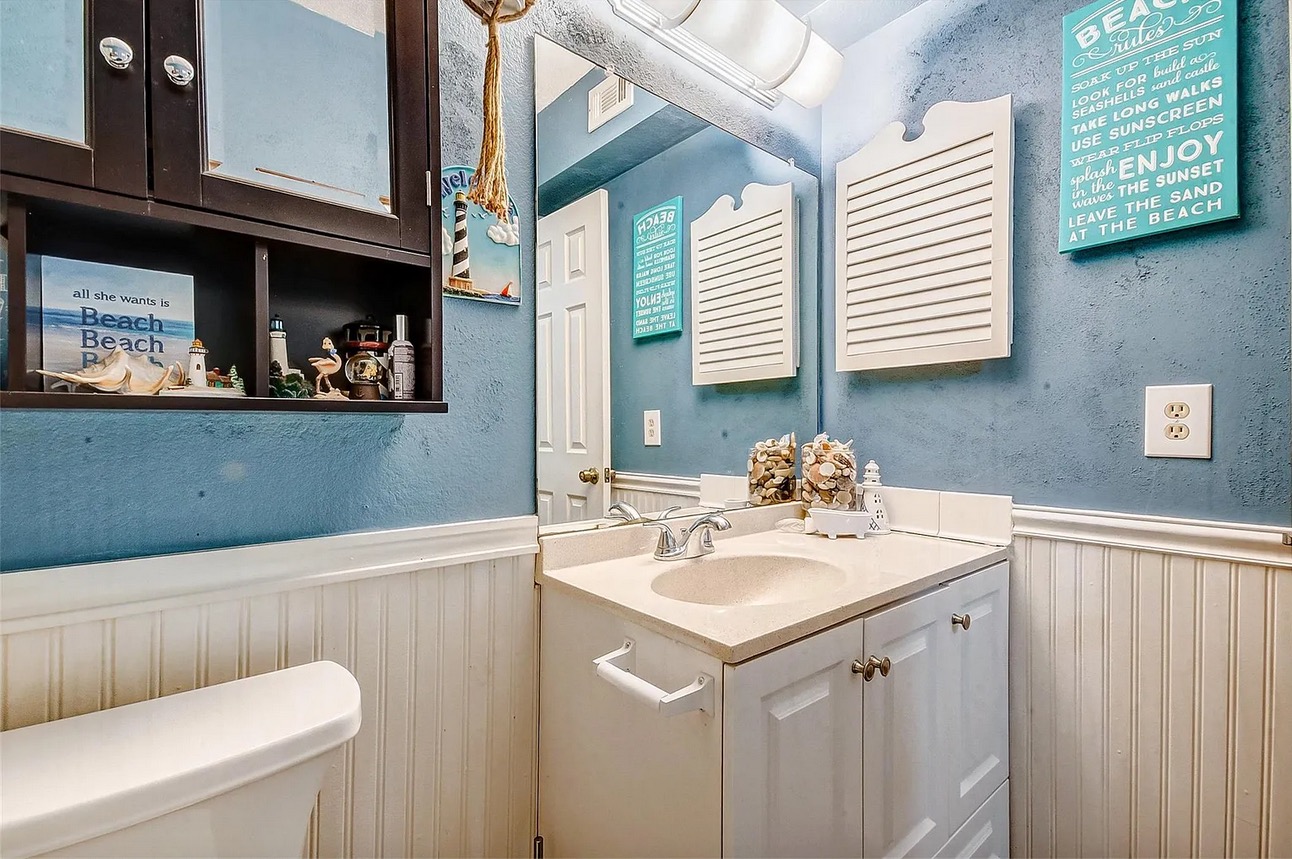
Here's the final reveal:


I finally completed a project that I'd been wanting to tackle for some time—giving the hall bathroom in my parent's home a glow up. It meant removing wallpaper, which is no one's favorite task. We kind of suspected it wouldn't be easy, and it wasn't, but we rolled with it, and the transformation is gratifying.
Mom has never been a fan of wallpaper in bathrooms. But this bathroom already had wallpaper when my parents purchased the home more than a decade ago. They'd been putting off replacing the paper, because—been there, done that—they knew that if the walls had not been prepared properly before papering, they'd be dealing with a mess. And they were right.
Read on to learn what happened as the project got underway and how I worked through the various problems that arose.
Why Does Wallpaper Removal Tear Drywall Face Paper?
In most cases, removing wallpaper does not bring the drywall face paper with it. This only happens when the original wall was not "sized" prior to papering.
Sizing is an old-school term for preparing the walls. Years ago professional paper hangers would apply diluted wallpaper paste and let it dry before hanging new wallpaper. The adhesive soaked into the fresh plaster and this acted as a sealant.
Today we have primers that work much better. But newbie DIYers faced with fresh drywall often don't know they need to take this extra step and prime the walls before hanging wallpaper.
When you purchase a home that already has wallpaper, you have no way of knowing if the person who installed it did the job properly. But you'll soon find out, because there's no way to remove wallpaper from poorly prepared walls without tearing the wallboard. You just have to remove it as best you can, then deal with the damage afterwards.
Fixing Torn and Gouged Drywall
In our project, large swathes of wallboard lost their face paper. No problem. The gouges can be repaired in three steps:
1. Primer the brown areas. (I use Zinzer Bin primer.)
2. Let it dry, according to the instructions on the primer, then mud and tape the areas.
3. Sand the walls, vacuum all dust particles and wipe down with tack cloth, then primer the entire wall, end to end. Now your walls are ready for paint or new paper.
Hiding Imperfections in Textured Walls
To make our paint project just that much more challenging, we were dealing with walls that were not all the same texture in this room. The walls in the shower area were deeply stippled—a kind of effect you get by using a deep nap roller that leaves a popcorn-like pattern in the paint.
The walls over the sink and toilet had a different texture, smaller and more like orange peel.
While the walls near the door were new wall board—these were the areas where there were tears.
Given three different textures, I was challenged to figure out how to make it all work cohesively. I decided to purchase a coarse sand-additive to mix into the paint—but to use it only on the walls outside the shower area. This way we could build those up to match the stippled areas.
Applying the first coat of paint to all the walls in the room, I used no sand additive at all. Then I gave just the stippled shower area a second coat. At that point I poured the sand mixture into the remaining paint and painted the orange-peel textured walls. Finally, I added even more sand to the paint, and I painted the repaired wallboard walls.
Here's the final reveal:


No comments:
Post a Comment