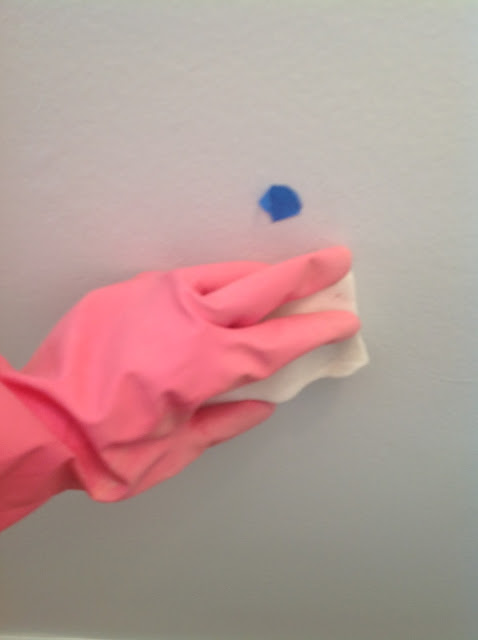
We're coming up on two years since we bought our home, so that means two years since we painted. With holiday guests expected, it's time for a touch up. So a few weeks back I went through the house looking over all the walls and placed a small piece of blue painter's tape next to every scuff, smudge, and scratch. Then I rooted through my paint closet and found the unused paint that I had thought to store, clearly labeled Farrow & Ball Blackened — thank you, Past Self! All I had to do now was mix some of that with 50% water, test a small area to see if the color blended (finger's crossed), and get this job done.
But I kept putting it off. Several weeks went by. Little bits of blue painter's tape were admonishing: "Paint me, paint me!"
It was enough to make me second-guess my wall color. Why did I choose a gray and not a white?!
Our previous home had stark white walls, so I was able to keep up with smudges and scuffs and scratches using Mr. Clean Magic Eraser. It really does extend the life of your paint — I'm not being paid to say this. I was painting every five years instead the recommended every two years.

Our walls now aren't exactly white — they're a light silvery gray. The paint is Benjamin Moore color-matched to Farrow & Ball's "Blackened". I assumed magic eraser was out for anything but white walls, but this near-calamity convinced me otherwise.
I was on another project —
painting an arm chair upholstery with Rit Dye (hell yeah, you can do that!) — when I inadvertently got red dye spatter on the wall.
Naturally, I reached for Magic Eraser. Not only did it do the trick — not a trace of red drops were showing the next day — but it happily didn't alter the chalky finish of our plaster. There were no shiny patches where I had applied the eraser and I couldn't even tell red spatter had ever been there.
I reasoned, if magic eraser can clean red dye, surely it can clear a few smudges from my gray walls, and this weekend I put it to the test.
 |
| Before |
 |
| During |
 |
| After |
Again...
 |
| Before |
 |
| After |
I've put away the wall paint for now. All I have left is to spot retouch some gouges and cracks in the kitchen and we are good to go. When I do, I'll post a step by step on how to touch up paint.

We're coming up on two years since we bought our home, so that means two years since we painted. With holiday guests expected, it's time for a touch up. So a few weeks back I went through the house looking over all the walls and placed a small piece of blue painter's tape next to every scuff, smudge, and scratch. Then I rooted through my paint closet and found the unused paint that I had thought to store, clearly labeled Farrow & Ball Blackened — thank you, Past Self! All I had to do now was mix some of that with 50% water, test a small area to see if the color blended (finger's crossed), and get this job done.
But I kept putting it off. Several weeks went by. Little bits of blue painter's tape were admonishing: "Paint me, paint me!"
It was enough to make me second-guess my wall color. Why did I choose a gray and not a white?!
Our previous home had stark white walls, so I was able to keep up with smudges and scuffs and scratches using Mr. Clean Magic Eraser. It really does extend the life of your paint — I'm not being paid to say this. I was painting every five years instead the recommended every two years.

Our walls now aren't exactly white — they're a light silvery gray. The paint is Benjamin Moore color-matched to Farrow & Ball's "Blackened". I assumed magic eraser was out for anything but white walls, but this near-calamity convinced me otherwise.
I was on another project —
painting an arm chair upholstery with Rit Dye (hell yeah, you can do that!) — when I inadvertently got red dye spatter on the wall.
Naturally, I reached for Magic Eraser. Not only did it do the trick — not a trace of red drops were showing the next day — but it happily didn't alter the chalky finish of our plaster. There were no shiny patches where I had applied the eraser and I couldn't even tell red spatter had ever been there.
I reasoned, if magic eraser can clean red dye, surely it can clear a few smudges from my gray walls, and this weekend I put it to the test.
 |
| Before |
 |
| During |
 |
| After |
Again...
 |
| Before |
 |
| After |
I've put away the wall paint for now. All I have left is to spot retouch some gouges and cracks in the kitchen and we are good to go. When I do, I'll post a step by step on how to touch up paint.


No comments:
Post a Comment