The problem with IKEA curtain systems is that you're buying components in pieces, so you don't get complete instructions. When you buy the rails, you get instructions on how to measure, cut and connect the rails. If you buy the wall brackets you get instructions on how to install the wall brackets, which differ from the ceiling brackets. If you buy the curtain panels, you get instructions on how to install the curtain hooks into the fabric. If you buy the hooks, you get instructions on how to hang the curtains. However, all the components are interdependent. The rails attach to the brackets in a way that is only shown on the bracket instructions. The curtains hang from the rails in a way that is only shown on the curtain hooks instructions. This is a "choose your own adventure" assembly, and there is danger up ahead.
Only those who've purchased and installed all the components and variations will know what to look out for. That would be me. I've suffered, so you won't have to.
Four warnings upfront:
1. You must use flat-head screws when installing the brackets. The brackets don't come with hardware. Purchase enough 1" anchors and screws so that you have two for each bracket — and make sure the screws are flat-head screws. This warning is buried in the instructions for the brackets.

I'll go into this in more depth when we get to bracket installation.

This information isn't included in the instructions for configuring the rails. It's only included in the instructions that come with the wall brackets. So, I didn't realize this until my dry run when I'd already made my rail cuts. It could have been disastrous — sending me back to IKEA in a snowstorm — except that I happened to have extra connector bars from previous installations on hand.
3. Cut your center rails to meet in the exact center. Because the brackets need to be placed at a connection point, I should have cut both rails on the back wall equally to have them connect in the very center. Instead I left one in tact at 55" and I cut the other one down to size. I thought I was saving myself some work — one less rail to cut — but, no dice. This put the connector bar to the far right off center. The brackets are pretty prominent and the one on the back wall would look terrible off-center. Luckily, I had extra connector bar on hand from a previous project or I would have been running back to IKEA for new rails — the connector bars come with a rail purchase and are not sold separately. Most people will not have extras on hand.
4. Leave off one of the end caps until this project is completely finished. If you don't, you will not be able to slide in the little plastic hanger on wheels that your curtains will eventually hang from. Yeah, they don't tell you this anywhere in the instructions. And the end caps are very difficult to remove when the rails are up on the wall, especially if your window is a bay window and the rails abut the side walls. Not fun. Lots of scratches on the plaster.

Phase I: Cutting and Connecting Your Rails
So, my original bracket placement plan looked like this and it was wrong.

The first thing to note is which side of the rail is "up" — it's the side that has an extra track. If you glance at the end, it looks like this.

You will want to remove IKEA labels now and clean up the adhesive. They don't come off easily but will be way more difficult to remove and clean up after the rails are assembled and on the walls.

Remove the end caps as well, using a pliers cushioned with a shop towel to protect the easily dented plastic end caps.

Step 1: Cut your corner piece approximately in half. The entire corner piece is said to be 8-1/4". Cut in half, each side is 4-1/8". About 2 inches of that will lay on your center wall rail with the other 2-1/8" taking up space on your wing rails.

I just eyeballed the corner piece and cut it in half and that worked.

Step 2: Cut your wing pieces.
Mine are 36" and 35", respectively. I cut them using the hacksaw/miter box that IKEA sells specifically for this job. I purchased it about 10 years ago and have used it multiple times. It makes clean cuts, especially on Kvartal rails or anything aluminum. It's important that the rails connect up smoothly. It will make the drapes slide nicely when all is assembled. You'll find the miter box kit in the curtain area for $5.99.
Step 3: Cut your main rail or rails, if you're going to be using more than one. I have a span of 92" inches on the back wall of my bay window, so I'll be using two rails to span it. They come in lengths of 55", so according to the revised schematic I should have cut each to 44" in order to have them connect in the exact center where the wall bracket must go in order to line up with and screw into a connector bar.

Step 4: Connect the corner pieces to the wings.

Step 5: Connect the corner pieces to the center rail.

Step 6: Connect your center rails if you have, as I do, more than one.

Step 7: Make sure there is a connector piece on the outer end of each wing rail. Loosen all of its screws so that it can slide around. Now place an end cap on just one of your wing rails. Leave the other one open. These actions are going to save you pain later.
Lay your connected rails on the floor. If you've made your cuts correctly, they should line up proportionally with the walls in your "bay".

Phase II: Install Your Wall Brackets
For a bay window, if your center wall is longer than 55" you'll be connecting rails and will need at least five brackets: One in the center and two supporting each of the wings, right and left. Here's a reminder of the revised schematic.

Step 1. Unscrew the small screw and separate each bracket from its plate.

Do this to all five first-thing; one of mine came stripped and I had to run back to IKEA for a replacement.

If you have drywall, Easy Anchors are awesome. But remember: No round-head screws.

Here's how mine looked.


Step 4: Slide the bracket over the plate and tighten the small screw that holds the bracket to the plate. Check that it's level.
Repeat Steps 3 and 4 until all brackets are on the wall.
Step 5. Connect the rails to the brackets.
WAIT! STOP RIGHT HERE.
You are approaching rough terrain. It's time to grab a helper, as you're going to need someone to hold the rails while you make the connections. You're going to need both hands free. (X-ray vision would also help. Hah.)
I'll try to make this as clear as possible.
I'll try to make this as clear as possible.
Your rails came with very little hardware. There's a screw with a washer on it. Find it and grab the same elbow wrench that you've been using to make all the rail connections.

The elbow wrench turns the screw, which needs to be screwed into one of the five screws on the connector plate. Yes, you're screwing a screw onto another screw.
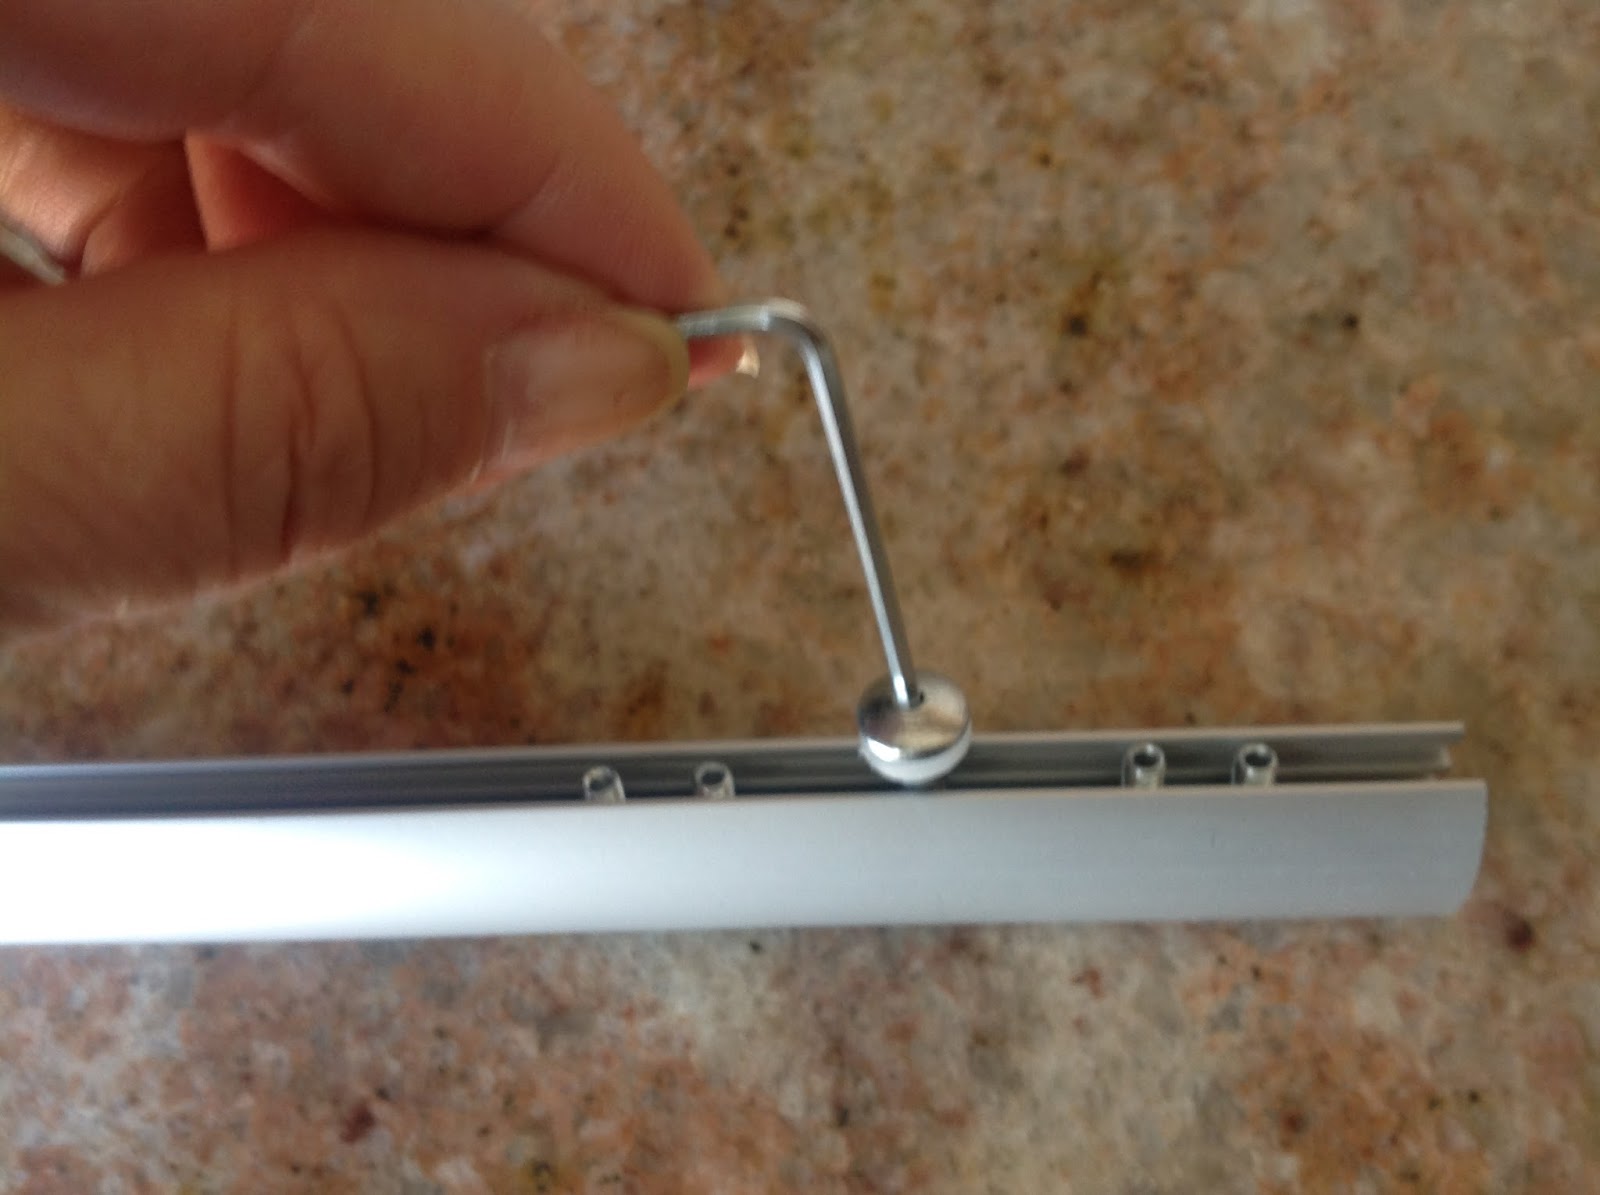
Like this, except...
Unless you're hanging your curtains strangely low, you're likely not looking down at this. You're standing on a ladder underneath the rail, looking up, and feeling around blindly, trying to get the wrench into the screw and the screw on top of the other screw in the connector plate. This is where it's helpful that you loosened all the connector plate screws, because you'll be able to shift the connector plate forward and back, until a screw aligns with the bracket.
Yeah. I know. Keep at it. You will eventually make the connections.
Trick #1: Stick the wrench standing upright inside a connector plate screw. Now, raise the whole rail up, until the wrench slips through the bracket slot. Now you know that the connector plate is properly aligned to "catch" a screw. Give the screw a few turns to the right and the connector plate is fixed, right where you want it.
Trick #2: Use a small mirror to check the position of your screws vis a vis the slot in the bracket.
Trick #3: Temporarily move the bracket slightly. One of my corner brackets was just not lining up with a connector plate screw. The curved pieces are tricky, as the connector plate can only be shoved so far until it hits the curve, so only about two screws are available to align with the bracket.
I unscrewed the bracket from its plate and bumped it over about 1/4" gently with a hammer.

This lined up the connector screw just where I wanted it.

Then I bumped the bracket back in place and tightened the screw holding the bracket to the plate.

Then I bumped the bracket back in place and tightened the screw holding the bracket to the plate.
Phase III: Hanging Your Curtains
IKEA curtain panels can hang multiple ways: using metal pleat hooks, plastic hooks or metal clips. Here's where I was testing the look of pleat hooks versus metal clips. I went with pleats.

Whatever choice you make, both pleat hooks and plastic hooks loop into the header tape on the back of IKEA curtain panels. If you're sewing your own panels you'll want to purchase IKEA curtain header tape. Or any curtain panel can use the metal clips, which work without any tape at all. It's a very informal style that looks great with most curtains.
Header tape comes in lengths of 122", so one pack should be enough to sew onto two curtain panels.

All three types of hooks are purchased separately. But it can get confusing. Plastic hooks come packaged with every IKEA curtain panel purchase, but the little plastic wheeled hangers that they hang from do not.

No matter which style hooks you choose, all three ultimately have to hang onto these plastic wheeled hangers. Remember at Phase II, when I cautioned to leave off one of your end caps? That's so you can insert these babies inside your rails. You're welcome!

So, every method of hanging requires these wheeled hangers and they must be purchased separately. But they are easy to overlook in IKEA market, because they come packaged with plastic hooks, which you may not think you need if you intend to use one of the other styles or if you think the plastic hooks that come with your IKEA curtain panels have got you covered.
No. You need them. Buy 16-20 for each curtain panel, depending on how many pleats you want in your curtain panels.
No. You need them. Buy 16-20 for each curtain panel, depending on how many pleats you want in your curtain panels.
The back of the package offers this hieroglyphic, showing how the wheeled hangers get inserted inside the rail. The two pieces of metal hardware are bumpers — so that you can limit how far the curtains can be drawn. You probably want one at either end of your rail configuration. Tighten them using the elbow wrench.

So, I'm going with the metal pleat hooks.

If you are too, you pinch the fabric and slide them into the header tape, pinch and slide, pinch and slide. I tried to place mine uniformly (-ish), every five loops — that band of white filaments (intended for installations using curtain rods) gets in the way of consistent hook placement. Just do your best; it won't show in the end.

Each of my panels took about 18 metal pleat hooks. I inserted a few extra wheeled hangers into the rails for each panel. They will be hidden by my curtains. One day if I decide to change curtain styles, I may be thankful that I don't have to un-install the rails in order to add more wheeled hangers. (Note: Do not do this if you're using the metal clips, because the curtains hang lower using this method and the extra hangers will be exposed at the top.)
Step 4: When you're finished placing your hooks, hang your curtain panels by looping each hook into a plastic wheeled hanger.

Step 5: Hem your curtains.
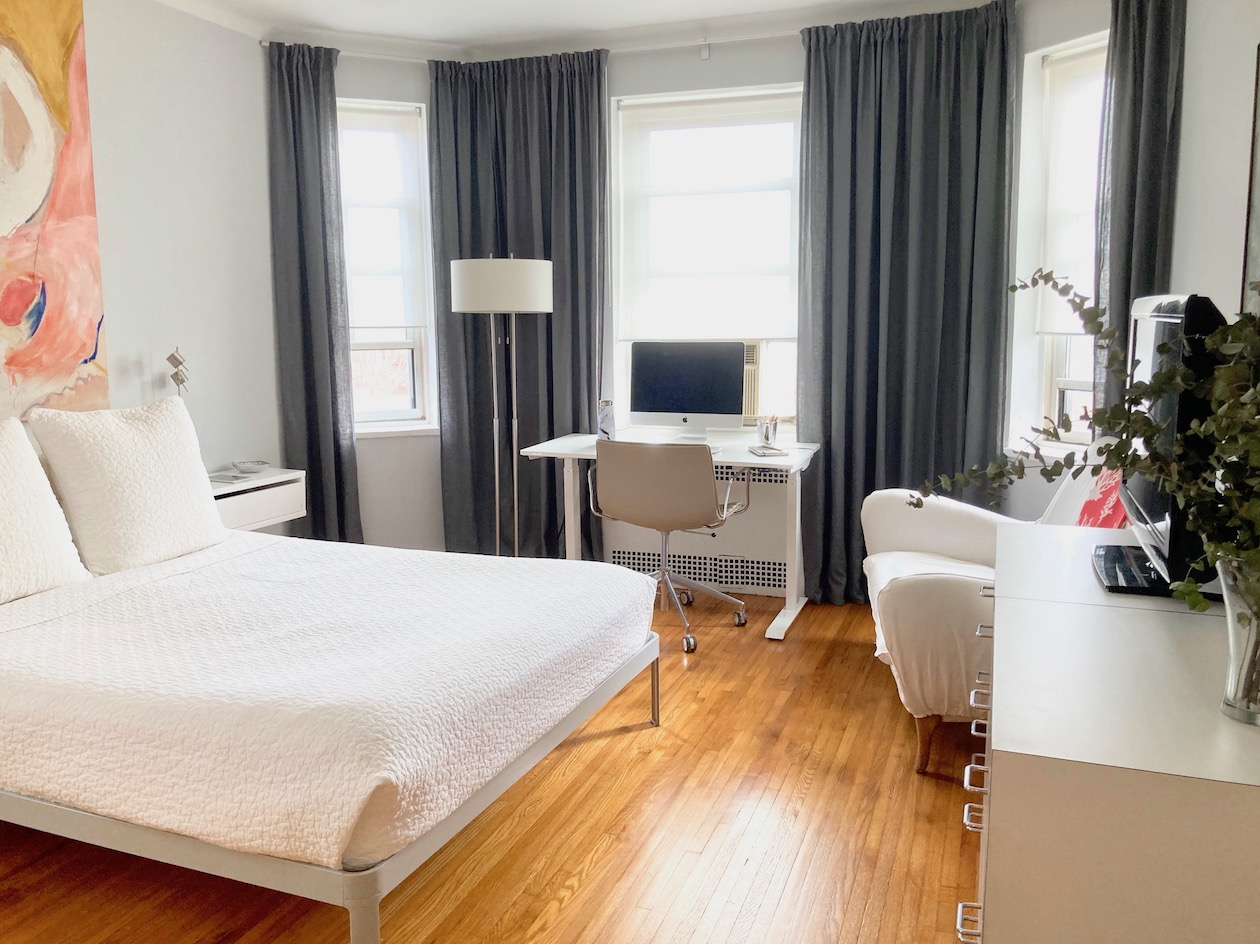
I first purchased Vilborg curtains and Glansnava curtain liners. The liners are quite nice and could be used as curtains if you want a satiny look and feel. Both are a silvery gray color. Vilborg, on the left, is a heavier weight, with a slubby feel and a subtle dark gray pin stripe. Glansnava, on the right is soft and satiny. My walls are painted Farrow and Ball "Blackened" which is a silvery gray also, so both these fabrics are fading into the walls. I exchanged them for charcoal gray linen Aina panels.
But in case you're reading this and considering the Vilborg or Glansnava, what information can I share about them?
But in case you're reading this and considering the Vilborg or Glansnava, what information can I share about them?
Vilborg on the left is 98" long and just skims the floor. When I measure from the brackets down to the floor it's 98", so I can confirm that the specs on the IKEA site and on the packaging are accurate. Glansnava are 108" and they pool on my floor. I personally love the look of pooling drapes, especially silky ones like these. It's very dramatic. It would be perfect if I were going for a glam Hollywood boudoir look in my bedroom. The 108" are pooling too much, though. I'd want to hem about 5 inches off them. If you don't have a sewing machine or don't want to use one, no sweat. IKEA has hemming tape that you can iron on.

One pack is $1.99 for 33", which is not enough to hem one panel. You'll need several packs to cover all panels (Ikea panels come two to a pack). I've used this hemming tape before and it works. When you launder or dry clean your drapes it doesn't come apart — the hem holds.
So, in the end I went with the darker gray Aina curtains. They're 100% linen, and I'm very happy with the results.


I hope I've managed to share the pitfalls to avoid and given you some tricks that I employed that will help you install an IKEA Kvartal curtain system without a problem.
It's a trouble-prone install, yes, but worth it in the end IMHO, considering the cost of alternative options. If you price it, you'll find as I did that — particularly for a bay window like mine — there are no other solutions under $500.
Oh, one more tip. Save any parts that you didn't use for next time.

Right now you may be thinking that you'll never install another IKEA curtain rail. But if you're like me, future you will forget the pain and remember the price. When you do, future you will be thanking current you for keeping a few spare parts on hand

Excellent tips, thanks!
ReplyDeleteThank you!
DeleteThis is gold!
ReplyDeleteI appreciate the compliment. It did take hours to document!
DeleteThank you for this amazing step by step! I am in the process of building up my courage to start a similar process.
ReplyDeleteIKEA has a new curtain rail system called Vigda. I haven't installed any yet. Hopefully, they are easier to use.
ReplyDeleteI wish I'd had this when I put the curtains up. Now I have to add a bunch more hooks and I can't get the oval shaped end piece off. Any tips? Please tell me I don't have to take the whole thing down!
ReplyDeletePull it away from the wall, cover the end cap with a soft cloth, then use a pliers to pull it off. Now you can slide more hooks inside. Good luck!
DeleteExcellent help guide. Any tips on how to remove oval end piece once installed? I need to add two more hooks for a new curtain.
ReplyDeleteCover the oval with a soft cloth (so you don't dent it) then use a pliers to pull it off. You can slide more hooks in. Then replace the end cap.
Delete